Setting up a new Android emulator with Genymotion on MacOS

At this stage, there are very few Android emulators that can support MacOS, and the experience is very general.
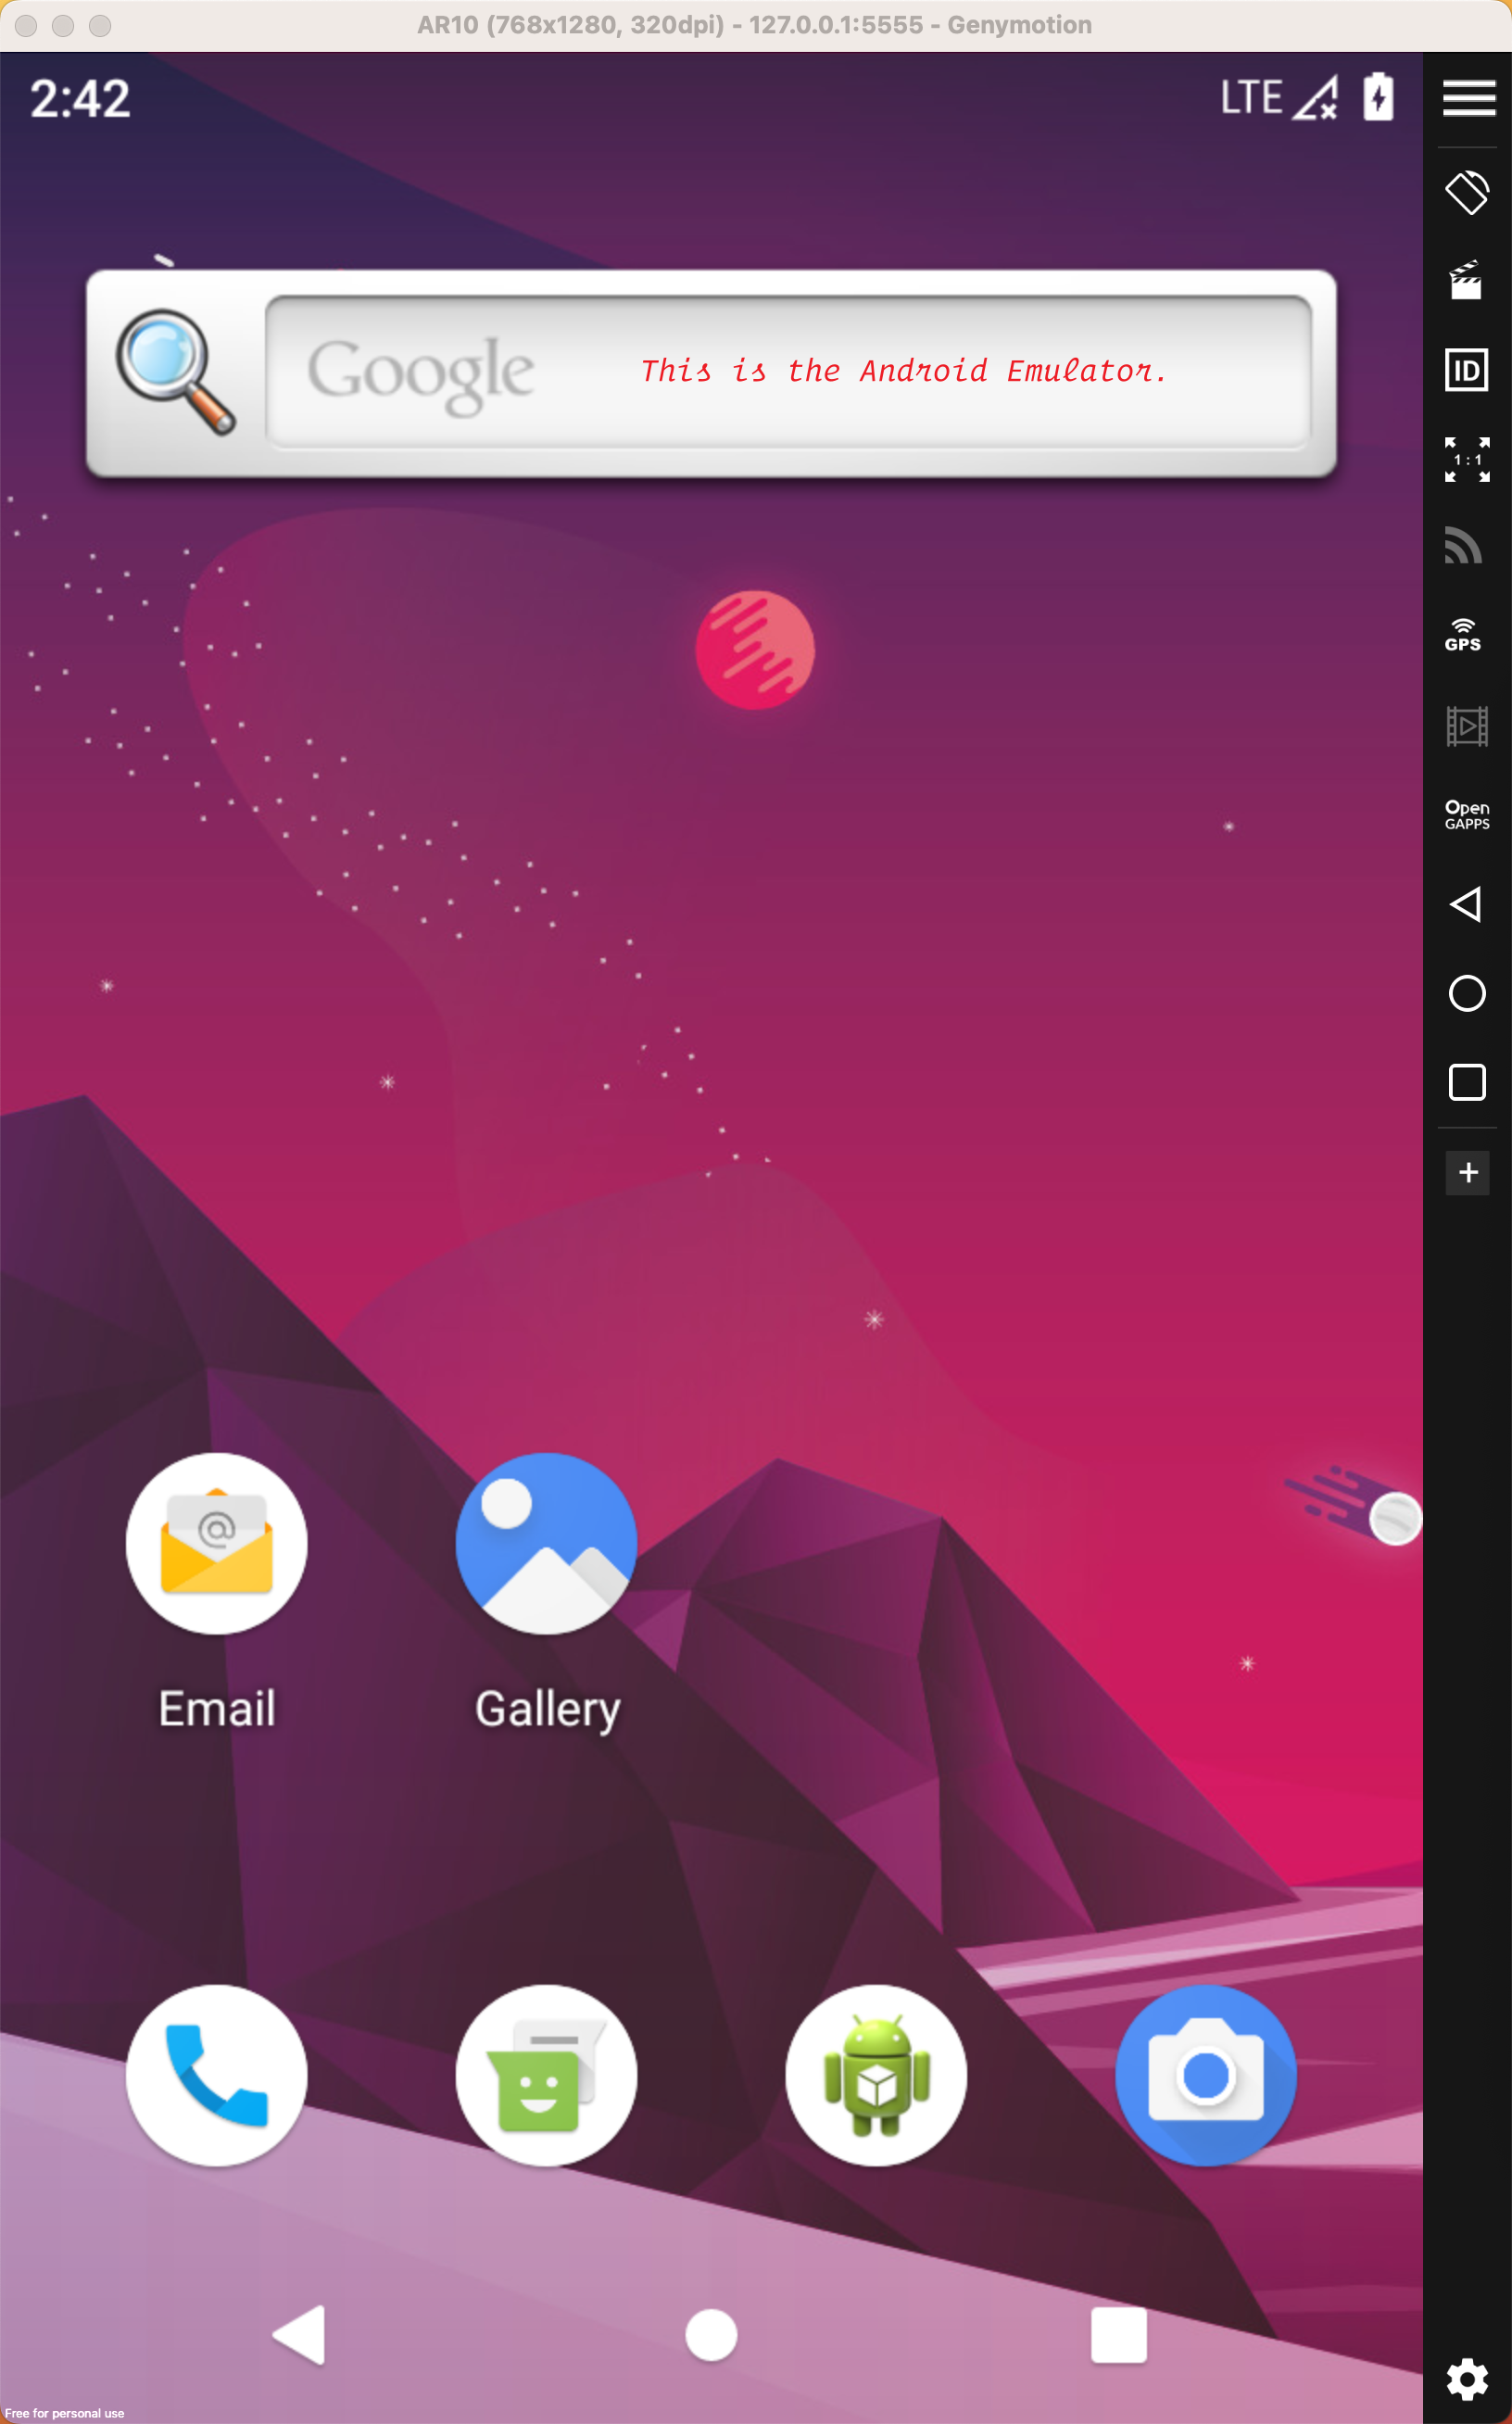
After our tests, Genymotion is the best performing Android emulator for MacOS.
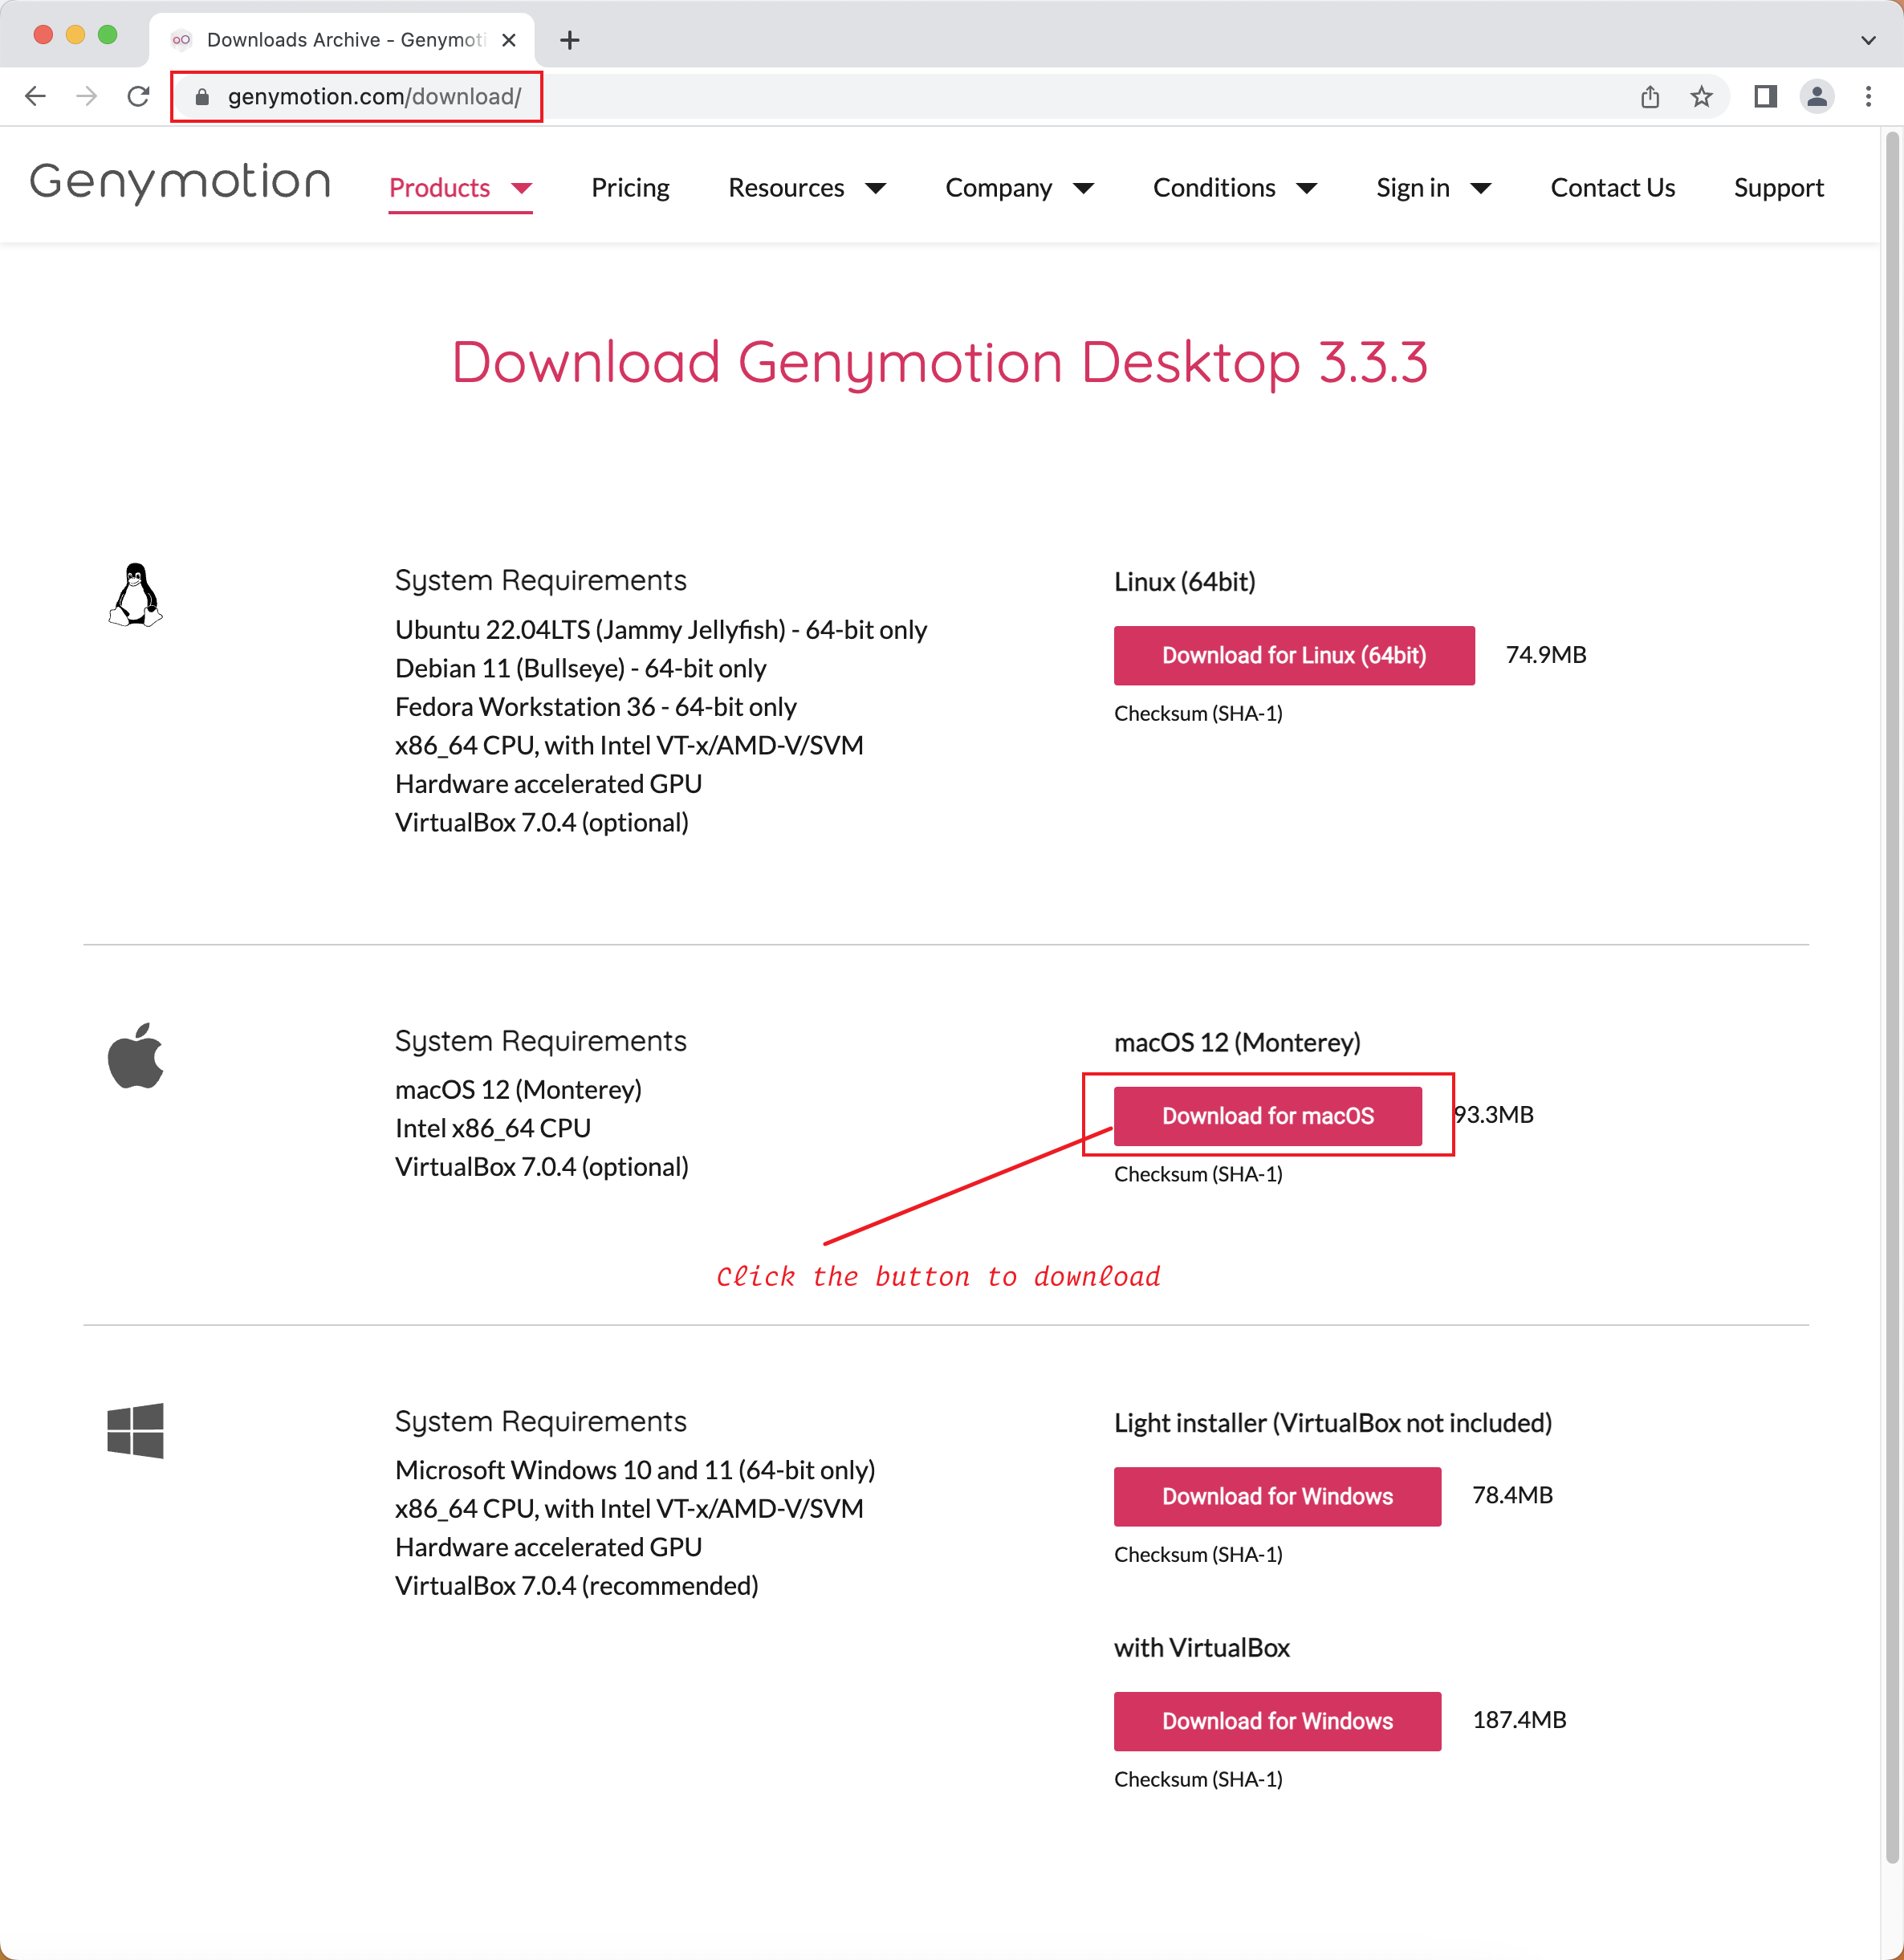
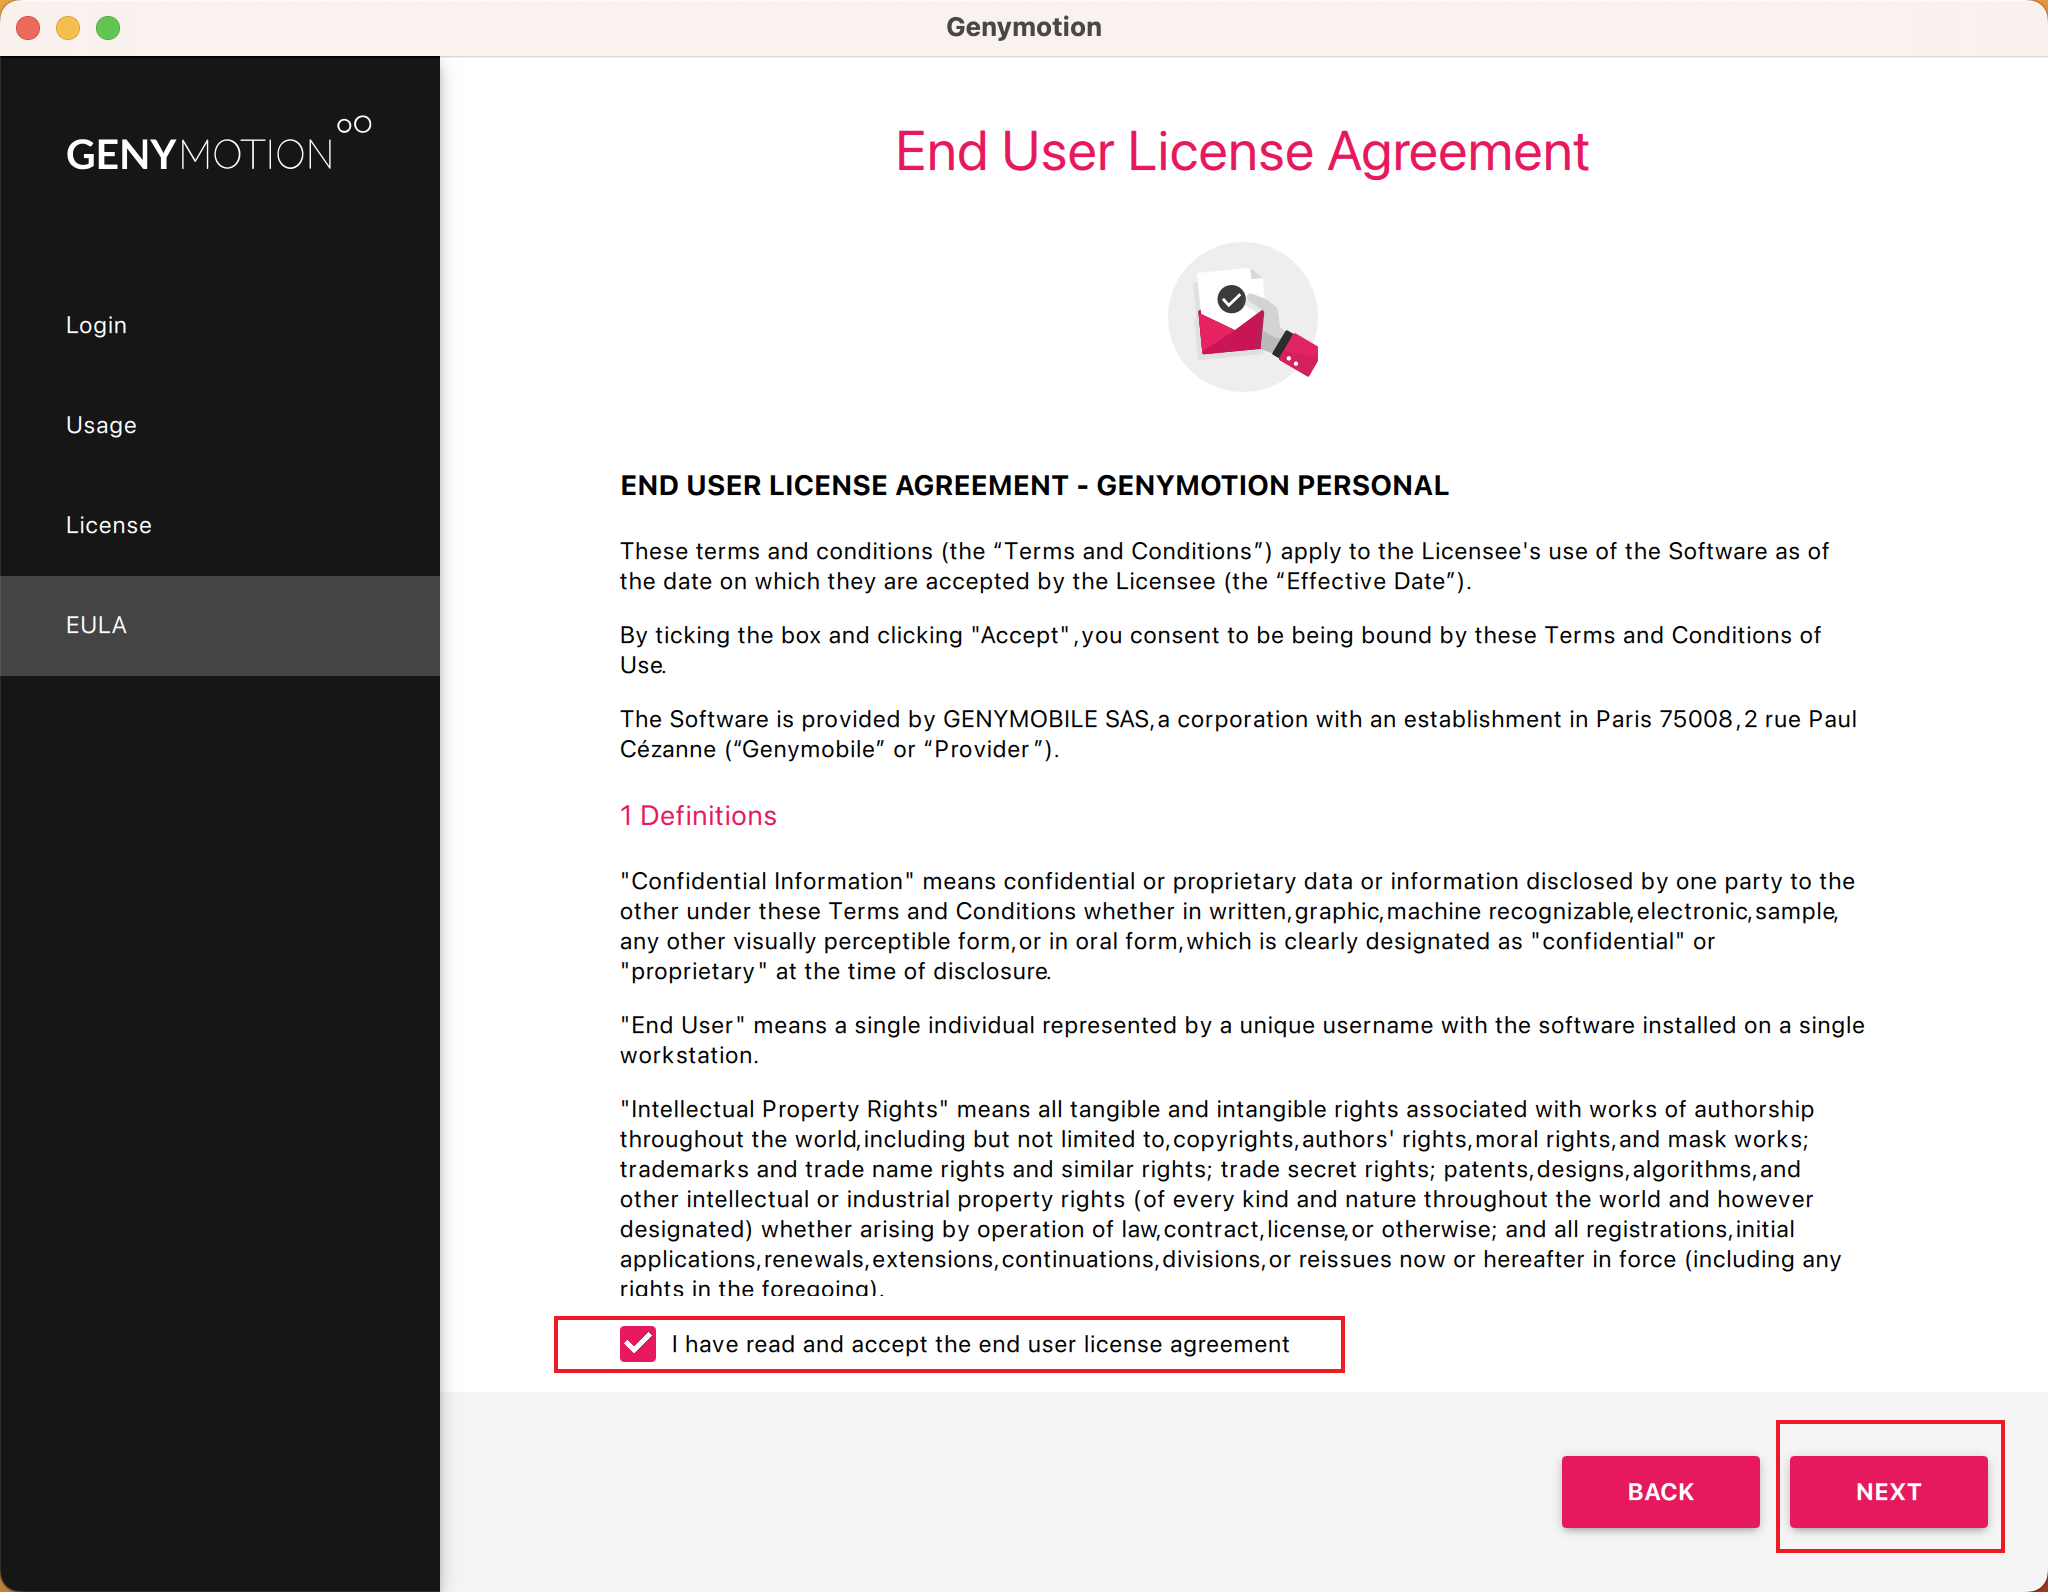
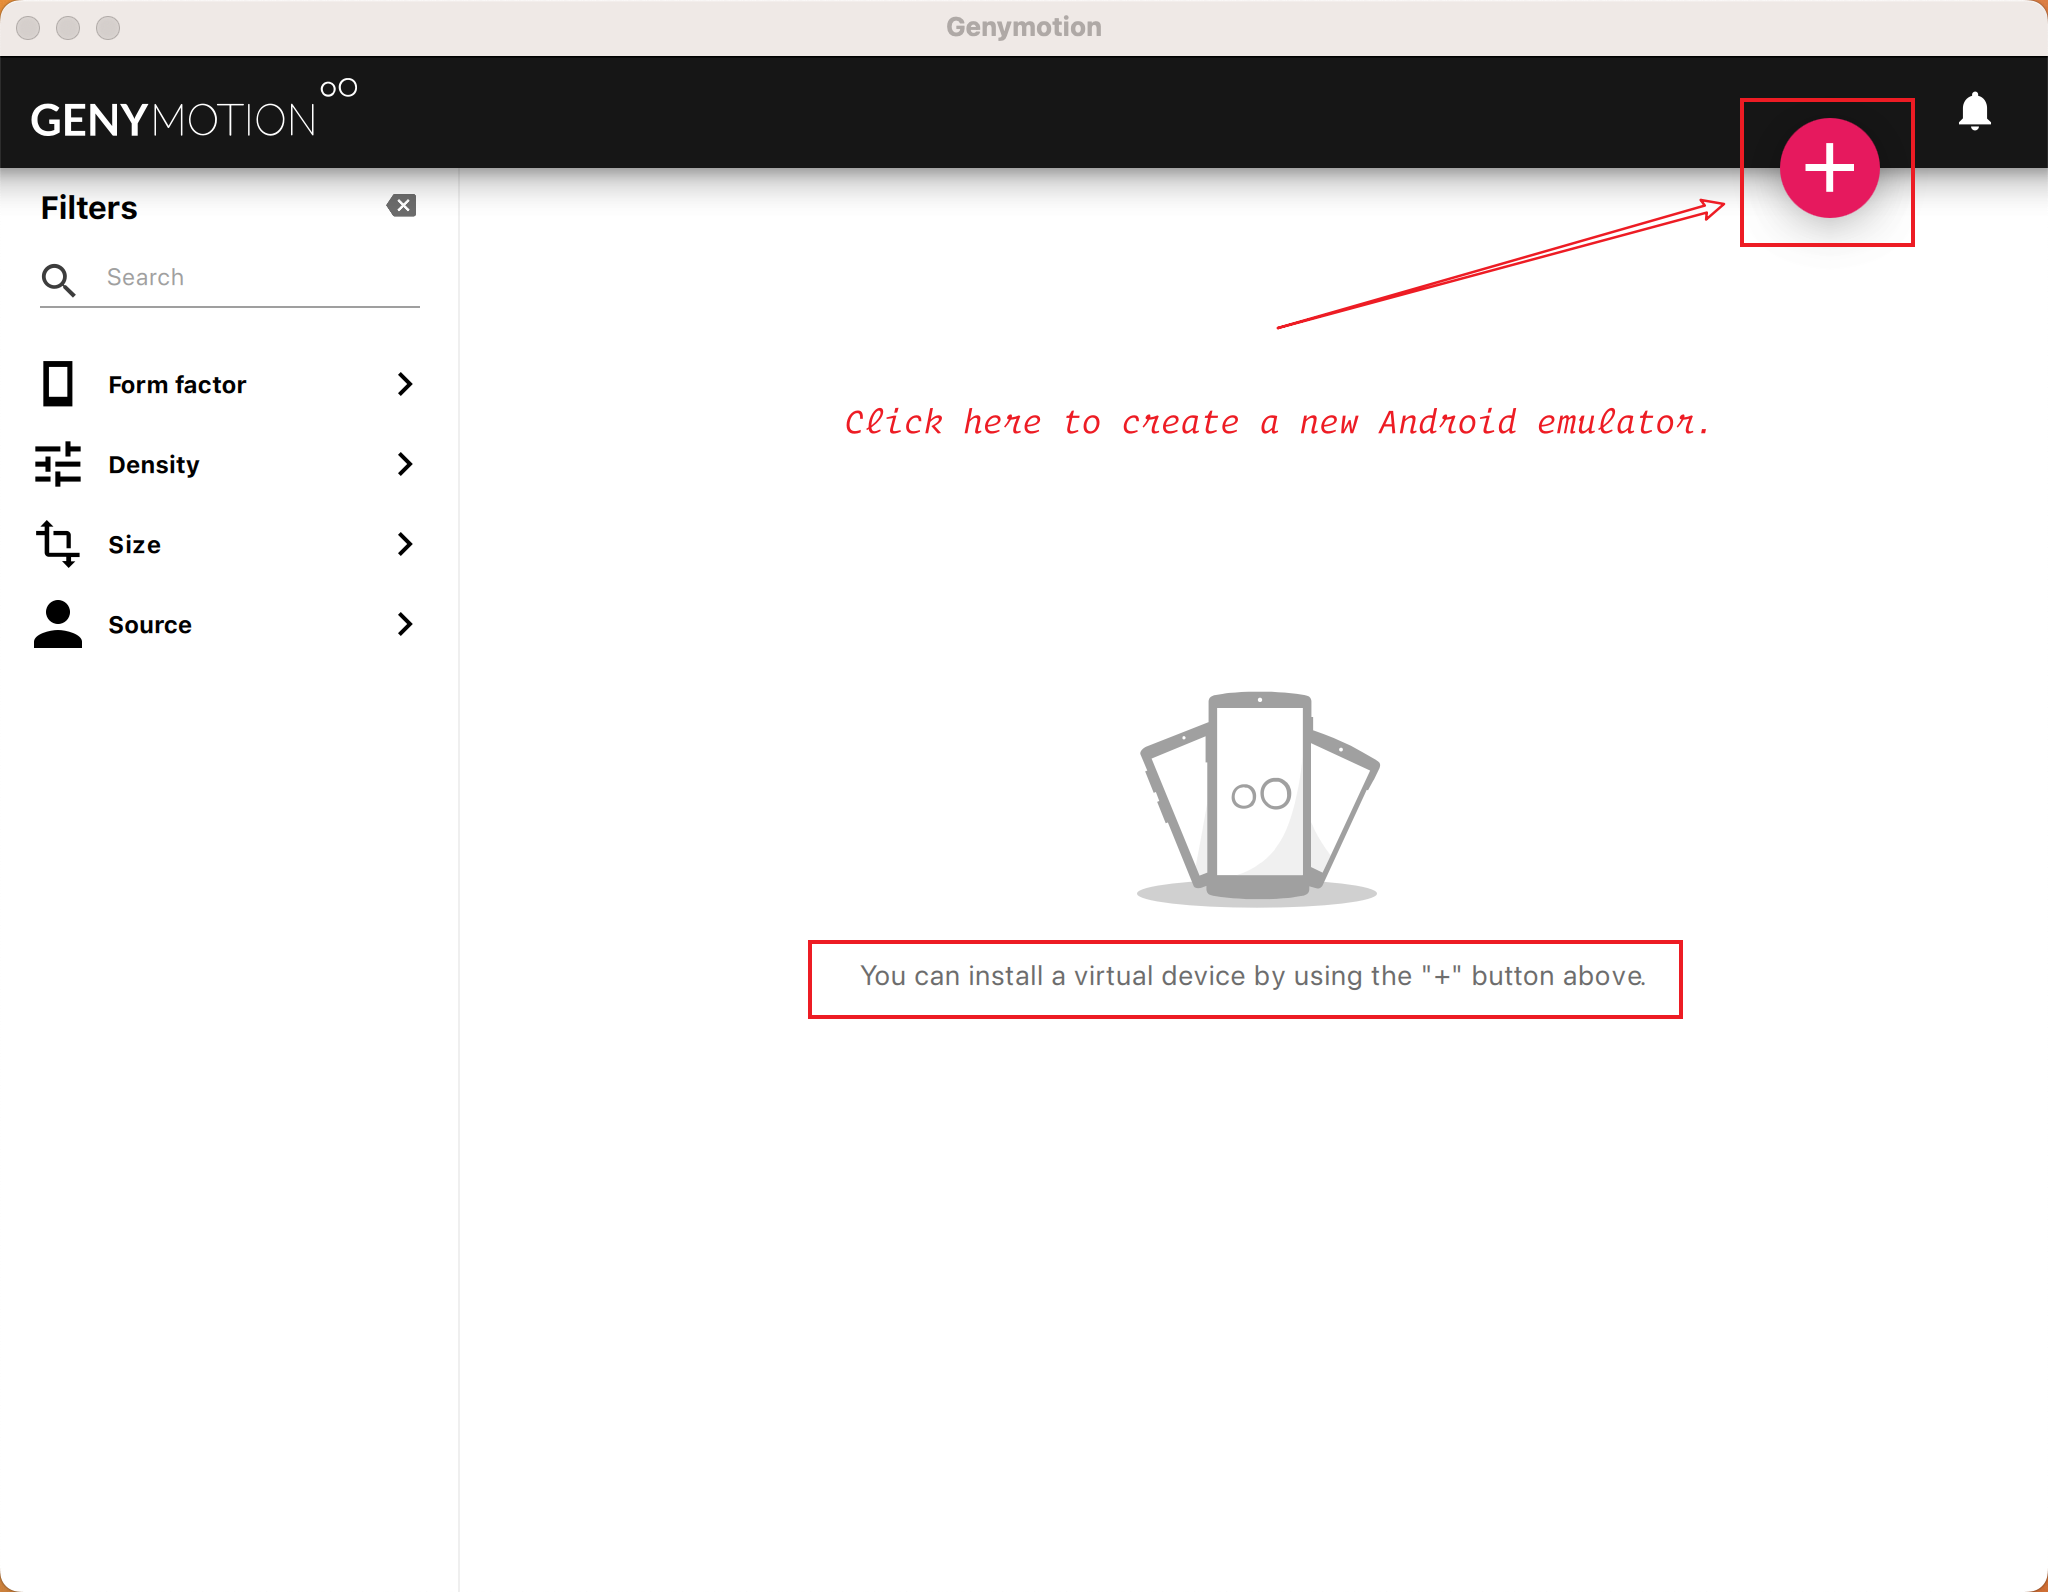
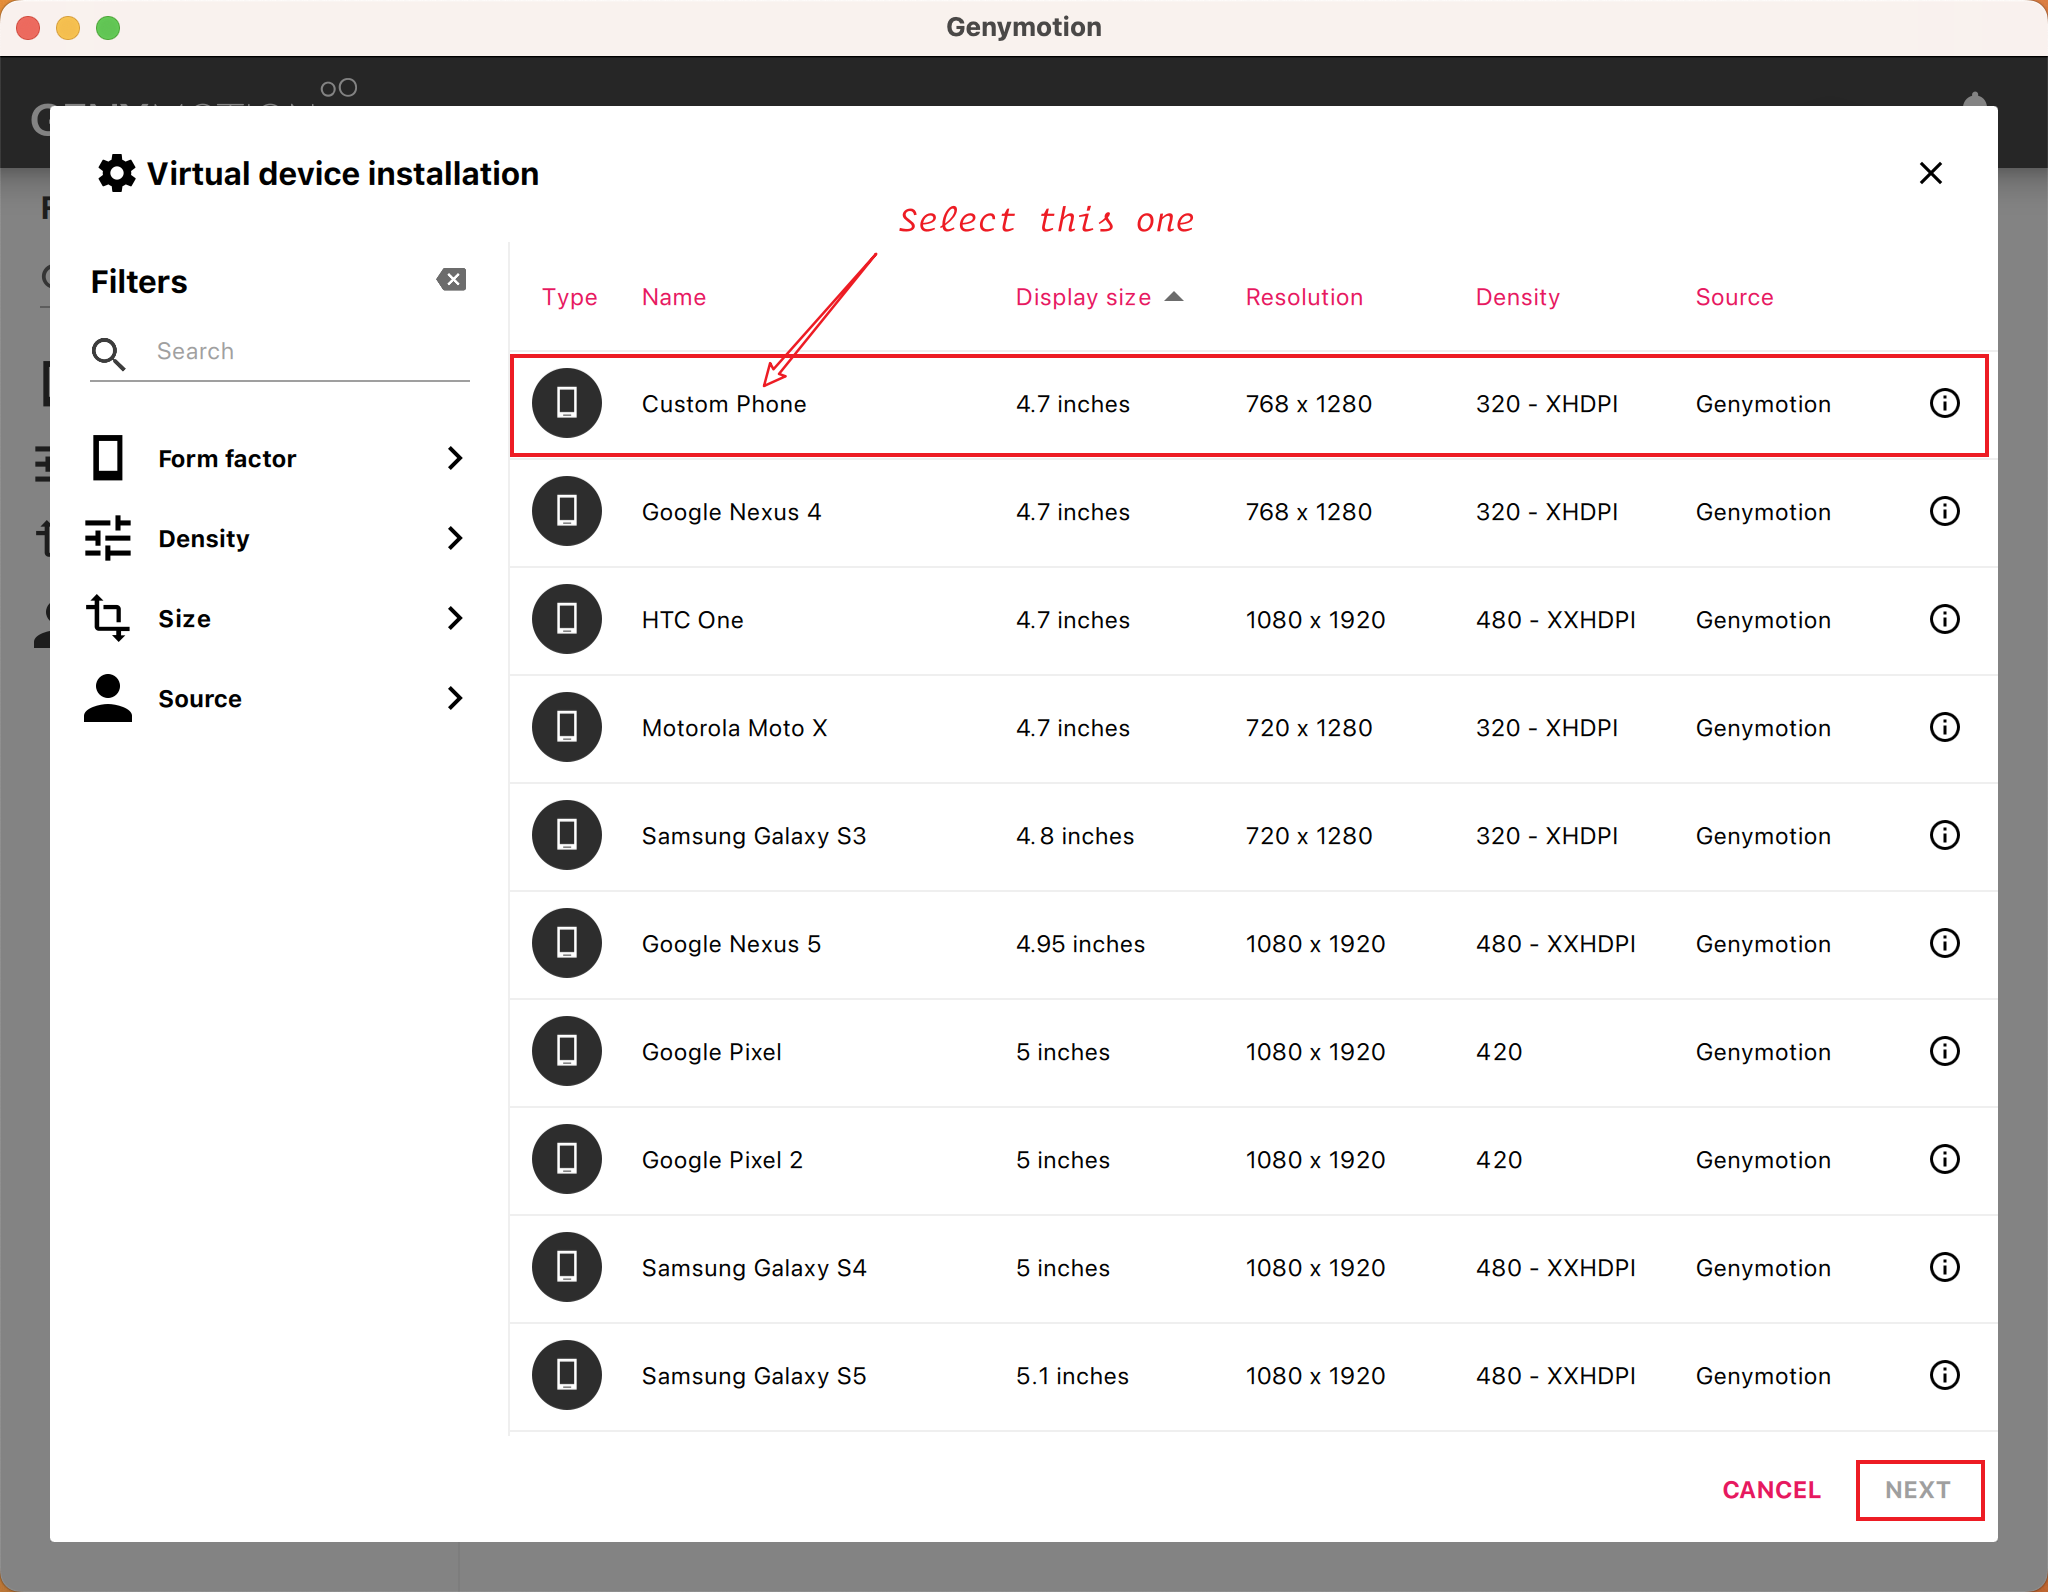
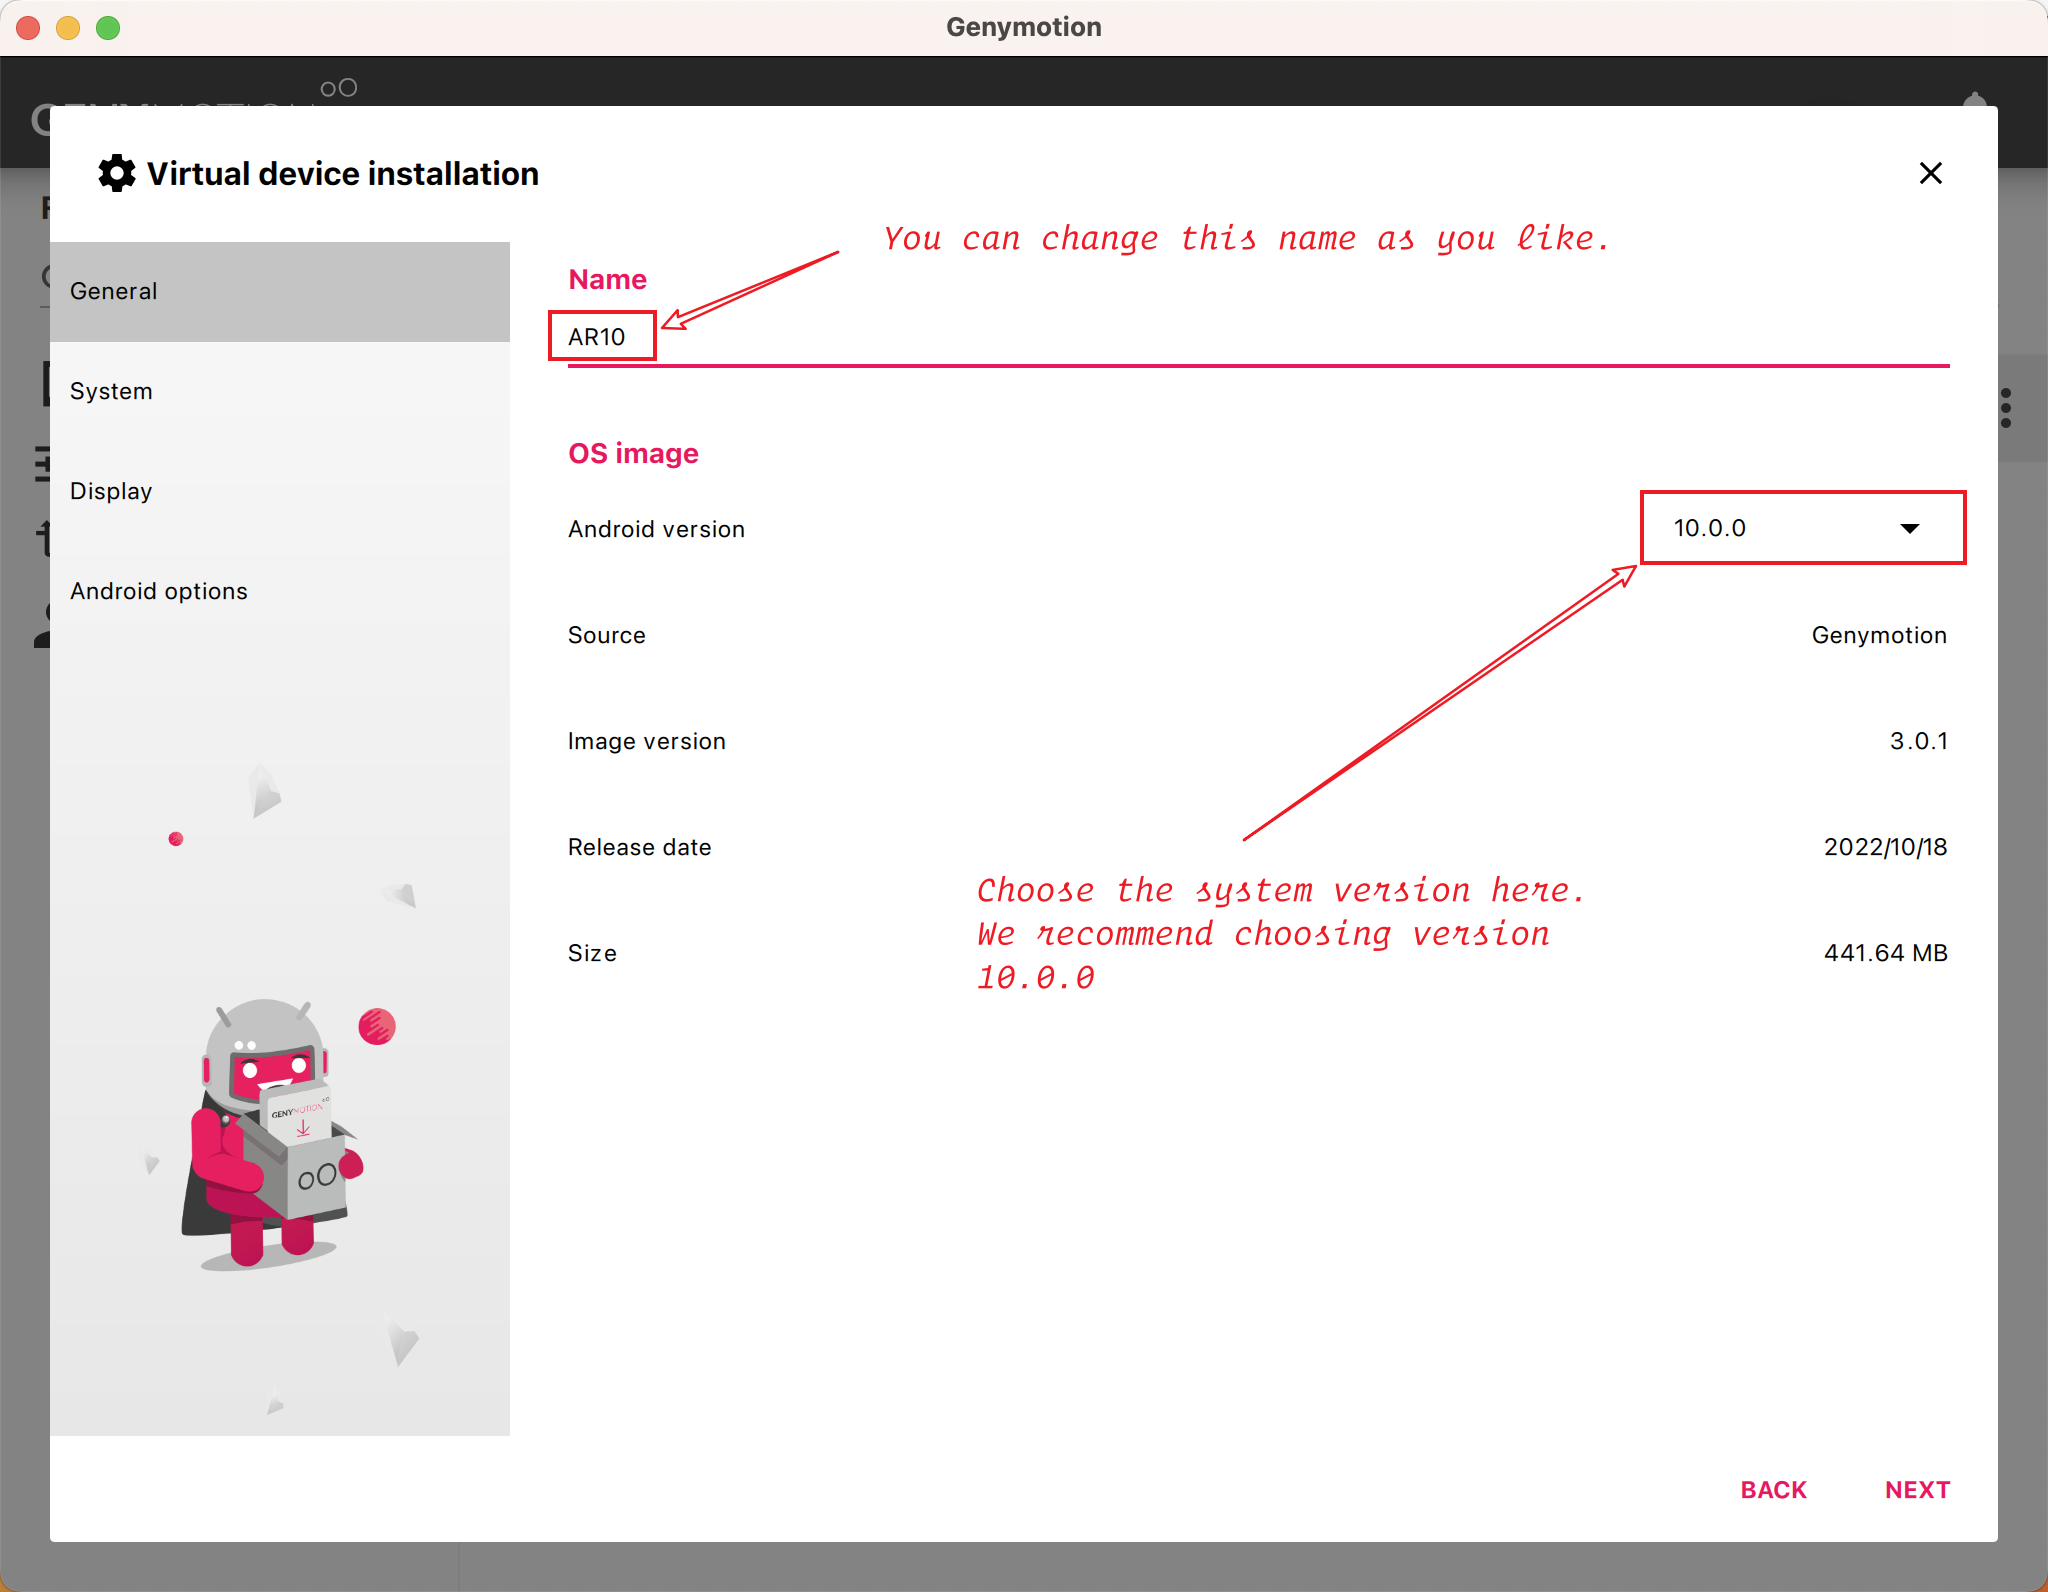
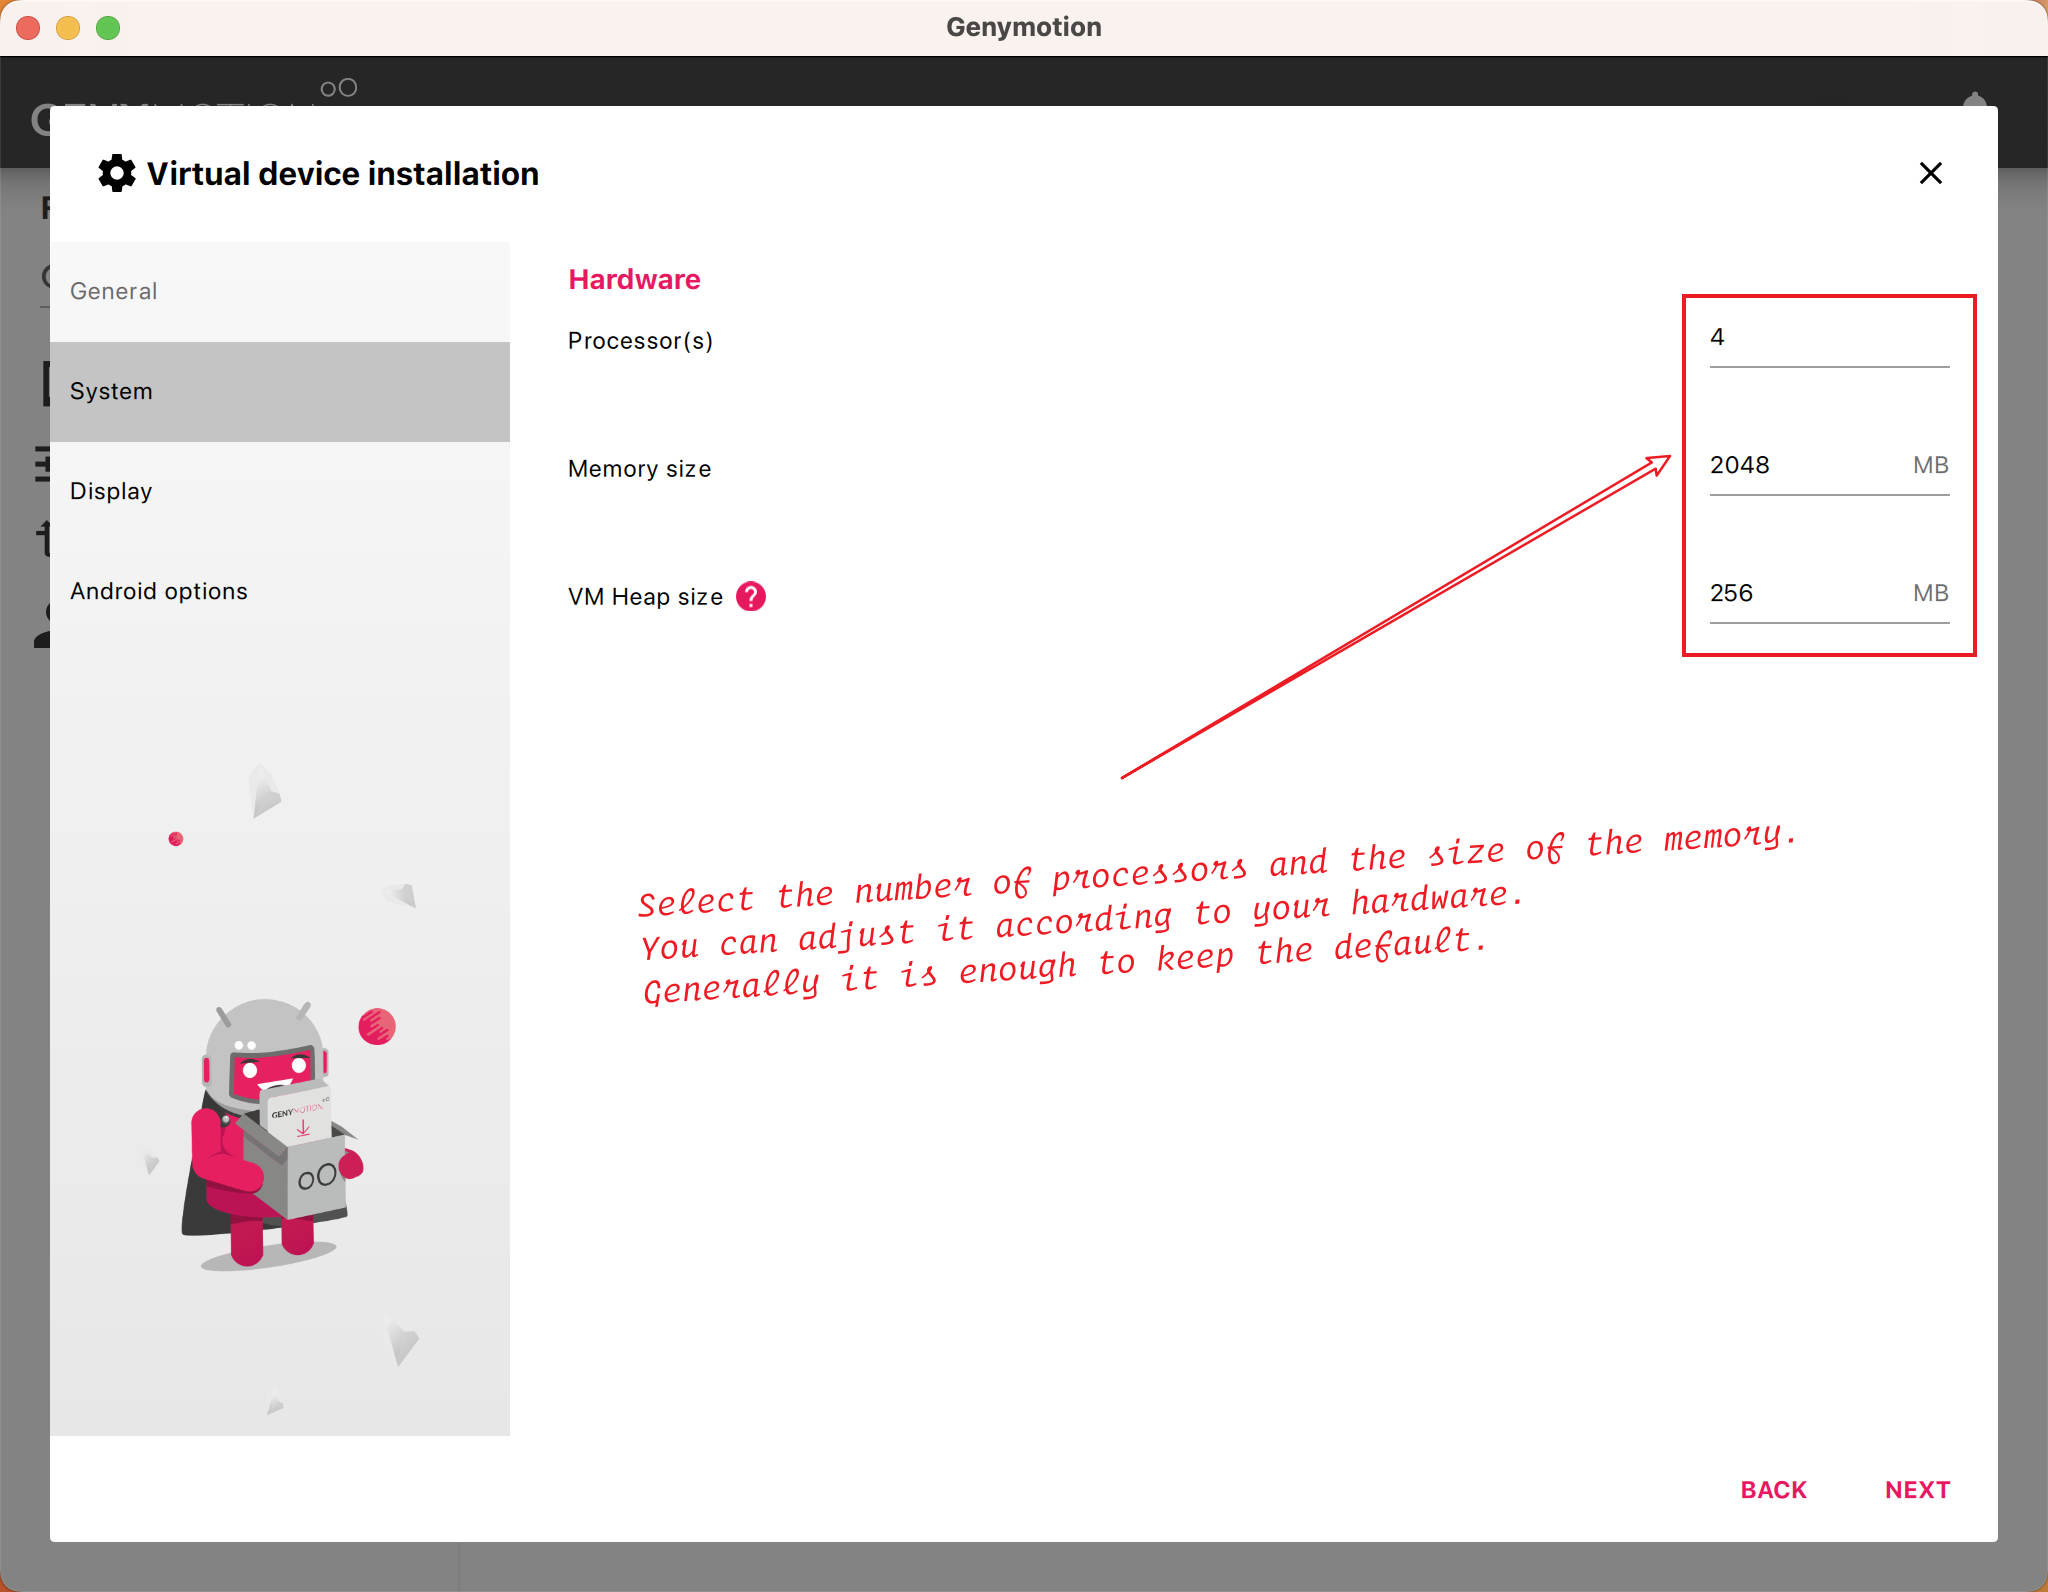
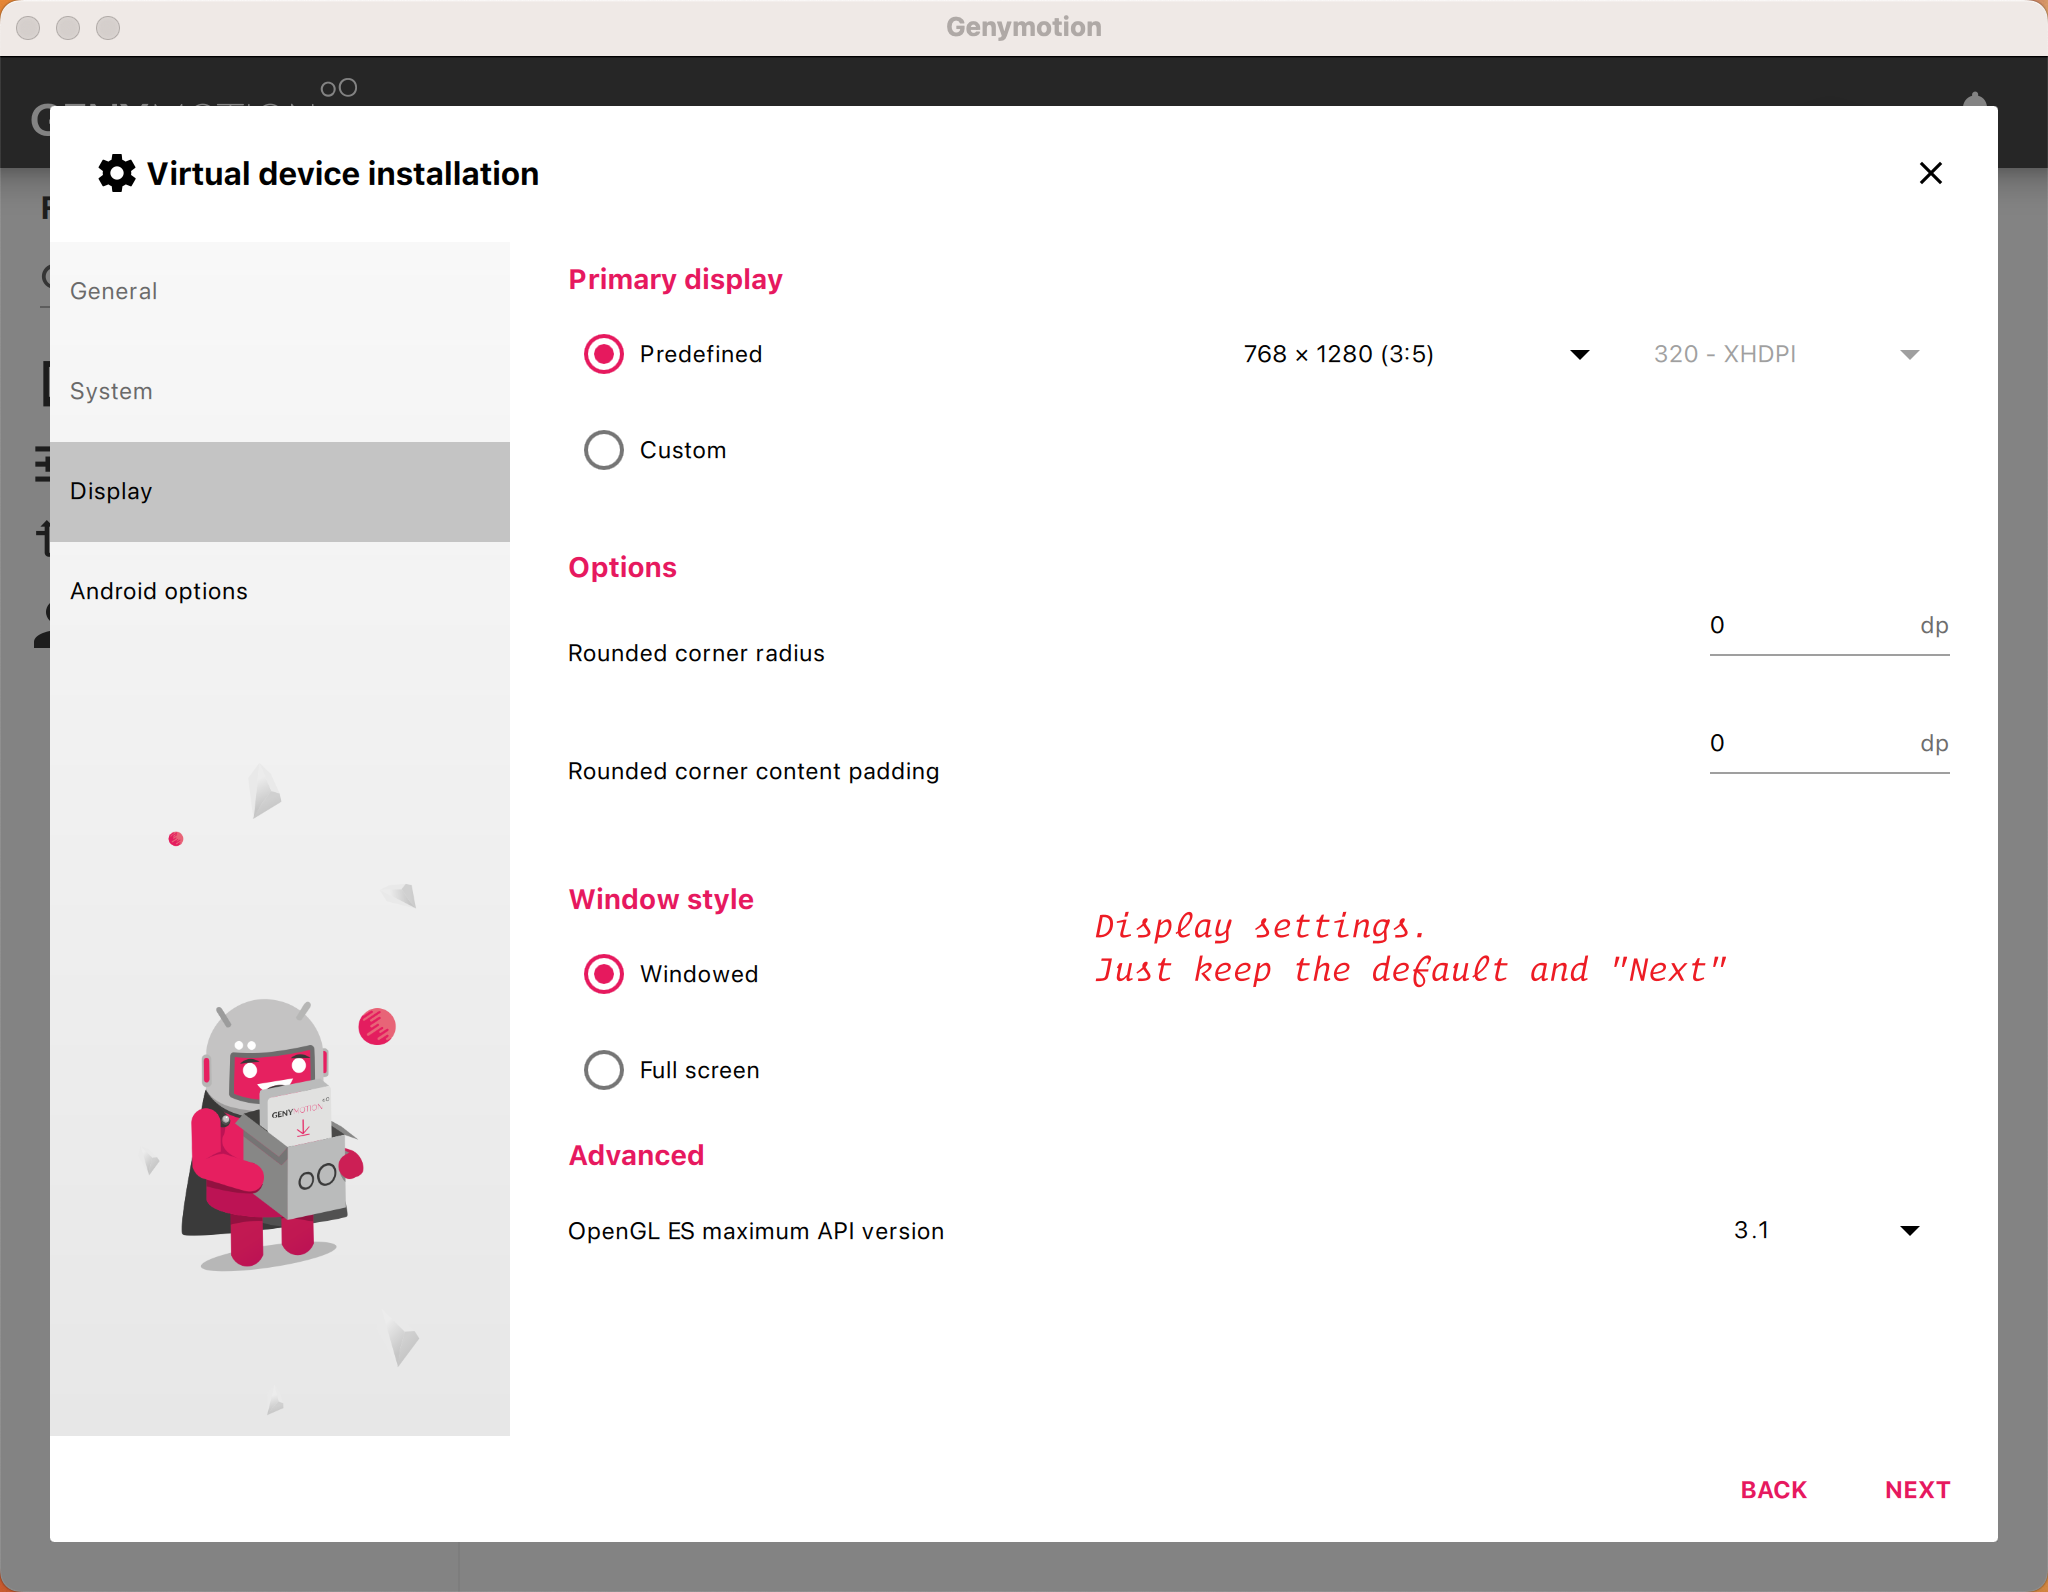
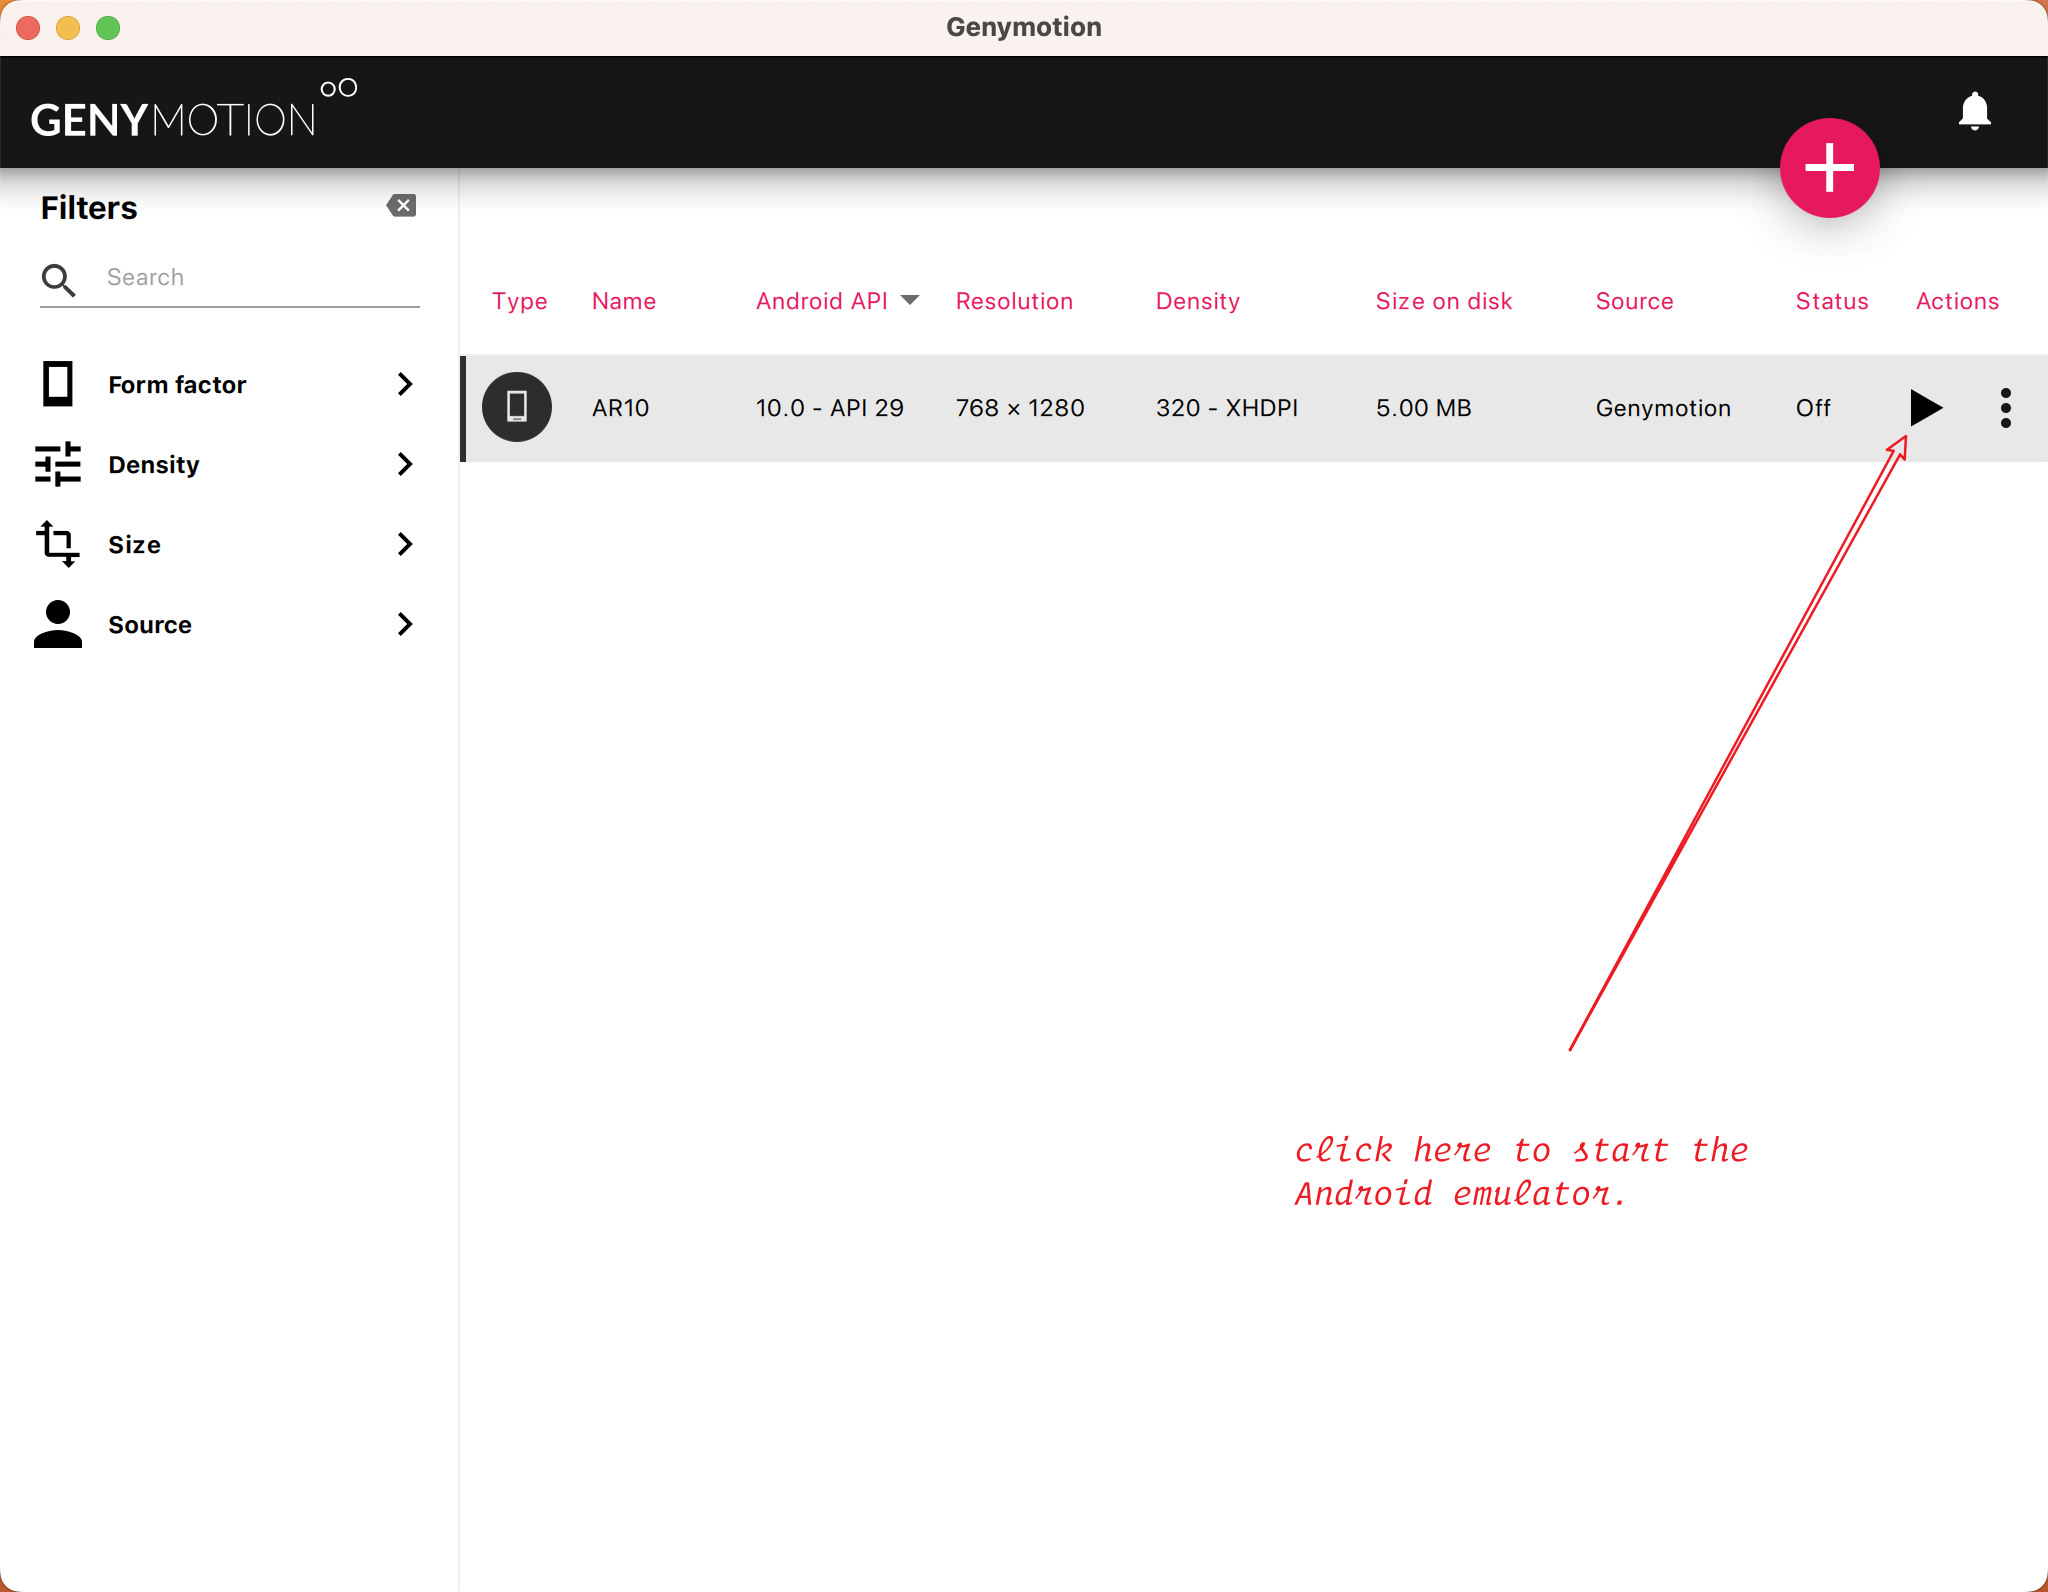
To use it, you need to register an account, and the initial installation and setup may be time-consuming.
However, it’s worth it.

1. Visit https://www.genymotion.com/download/, download the MacOS version and install it.

2. Open Genymotion, and login with your account. If you don’t have an account, you need to register one by clicking the “CREATE ACCOUNT” button in the bottom right corner.

3. You need a license, in this screen, select “Personal Use”.

4. Now, let’s create a new Android emulator. Click on the red “+” symbol in the upper right corner of the screen.

5. Select the first item in the list and click the “Next” button in the lower right corner.

6. Now, you can rename this emulator. Then select the system version. We recommend choosing version 10.0.0.

7. Hardware settings. Select the number of processors and the size of the memory.
You can adjust it according to your hardware. Generally it is enough to keep the default.

8. Display settings. Keep the default and “NEXT”.

9. Android options. Keep the default and “INSTALL”.

10. After the installation is finished, you will get an Android emulator. Click the launch button to start the emulator. It’s like you have an Android device. You just need to drag and drop the apk file to the emulator window to complete the installation of the application.